User Guide
Validate cycling routes, identify restricted road segments, and ensure compliance with event regulations.
1. Importing Your Route
A GPX file contains your planned route data. Most navigation platforms provide options to export your tours in this standard format.
Exporting your GPX files
- Komoot: Open your planned tour, select "Export to GPS device," and choose "Download GPX file."
- Strava: From your routes dashboard, select a route and click "Export GPX."
- Ride with GPS: Open your route, select the "Export" tab, and choose "GPX Track (.gpx)."
Loading into Route Validator
Click "Load GPX" in the top navigation bar and select your file. Once imported, your route will be rendered on the map for analysis.
2. Defining Forbidden Roads
Forbidden roads are defined using KML (Keyhole Markup Language) files. These files allow the application to identify restricted areas or specific road segments that must be avoided.
Sourcing KML data
- Event Organizers: Many races (such as the Transcontinental Race) provide official restricted road lists via Google My Maps, which can be exported as KML.
- Custom Datasets: Users can manually define restricted areas using tools like Google My Maps or Mapog Story and export them for use in Route Validator.
See the Google My Maps guide for step-by-step instructions on creating custom KML files.
- OpenStreetMap (Overpass API): Query the OpenStreetMap database directly within the application to identify specific road types (e.g., "primary roads") across entire regions.
Loading into Route Validator
Click "Load KML" in the top toolbar to import the file. The restricted roads will appear in the "Forbidden Roads" list on the left sidebar and will be highlighted on the map.
3. Interface Overview
The interface is designed to keep the map central to your planning workflow.
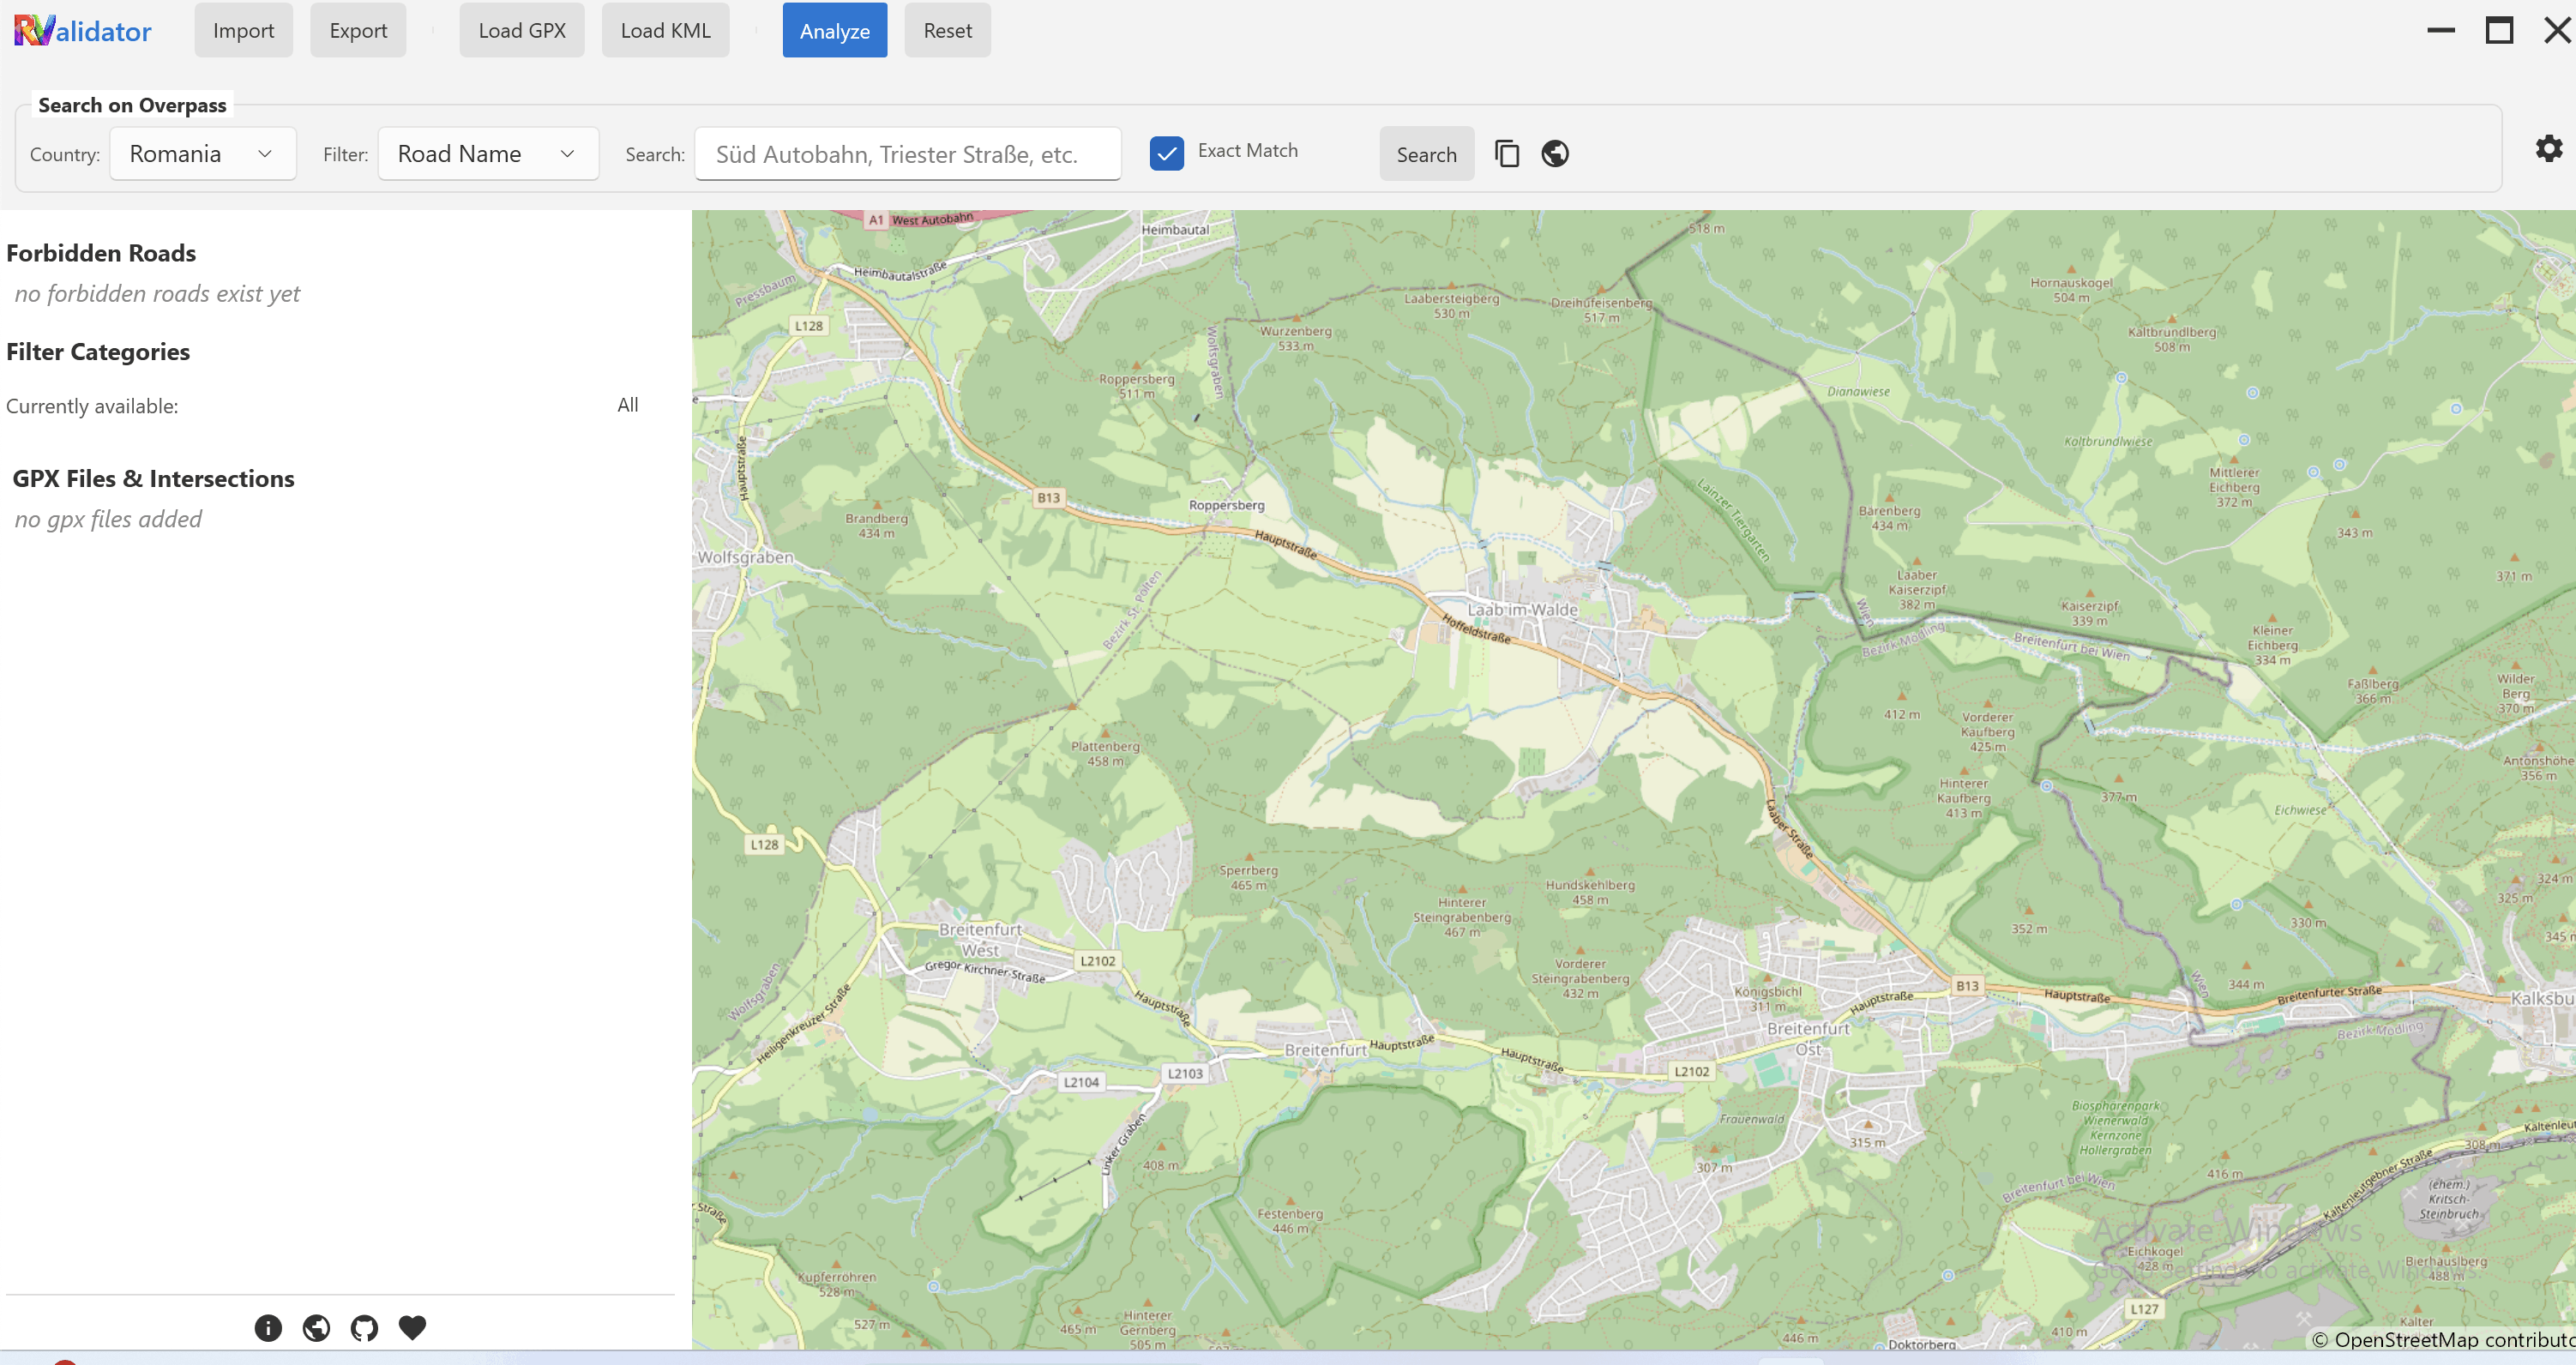
Key Components
- Top Toolbar: Access primary actions including Import/Export, GPX/KML loading, the Analyze tool, and the Reset function.
- Search on Overpass: Located at the top, this section allows for dynamic road queries from the Overpass API.
- Left Sidebar:
- Forbidden Roads: Manages all active restricted road datasets.
- Filter Categories: Toggles visibility for different road types and classifications.
- GPX Files & Intersections: Lists loaded routes and highlights specific points where they conflict with forbidden roads. Clicking a conflict will center the map on that location.
- Map View: The central workspace for visualizing routes and restrictions. Appearance settings can be adjusted via the gear icon in the top-right corner.
3a. Advanced Search (Overpass)
The Overpass search allows you to pull live data from OpenStreetMap to identify roads by name or classification.
- Country & Filters: Narrow your search to a specific region and road attribute.
- Match Type: Use "Exact Match" for specific road names, or uncheck it to find any roads starting with your search term.
- Pro Tip: Use Copy Query and click the world icon to Open in Overpass Turbo. After copying the query, you can paste it into Overpass Turbo to refine your search or simply export the .kml file for further analysis.
4. Running the Analysis
The Analyze tool identifies intersections between the planned route and active restricted datasets.
- Initiate: Click "Analyze" in the top toolbar. The application will process all loaded GPX files against active forbidden road data.
- Review Conflicts:
- On the Map: Intersections are marked with distinct visual highlights.
- In the Sidebar: Expand "GPX Files & Intersections" to view a comprehensive list of detected conflicts.
- Inspect: Select any item in the list to automatically center the map on the conflict location.
5. Session Management
The application allows for saving the entire workspace state, including GPX routes, loaded KML datasets, active Overpass queries, and current map configurations.
- Exporting State: Saves the active session to a single file. Regular exports are recommended during complex planning phases.
- Importing State: Restores a previously saved session, ensuring continuity in the planning process.
Planning Best Practices
- Regular Session Backups: For long-distance events like the TCR, utilize the "Export State" feature to prevent losing hours of planning work.
- Data Optimization: Enhance map clarity by toggling visibility in the "Filter Categories" section. I usually turn off everything except the specific roads I'm worried about.
- Workspace Maintenance: Use the "Reset" function when starting a fresh project to ensure your analysis environment is clean.